How to Use the Continuous Border Hoop
Endless or continuous hoop designs are specially digitized for creating borders and other long connected designs seamlessly. Some collections may have corner connectors included to permit easier continuous borders around a corner.
Sewing these designs is quite easy, especially when using one of the specialty hoops that are available for most home embroidery machines with a minimum 5" x 7" sewing field. ThisHow To covers tips for getting good results with specially digitized continuous designs and an appropriate hoop.
Many embroidery programs provide tools for building continuous designs. These instructions only cover working with pre-made designs intended for this use.
ABOUT THE HOOP
Specialty or accessory hoops specially made for continuous hoop usually feature a clamp type mechanism rather than the two-piece hoops normally used for machine embroidery.
The advantage of the clamp is that it makes it easier and quicker to reposition the fabric for the next placement. The disadvantage this method of hooping is not as secure as standard hoops.
Most continuous hoops are slightly smaller than a 130×180 and are designed to work with strips of fabric, placing the design fairly close to the edge. For best results. cut your strips large enough to be hooped on all sides of the hoop then trim to size afterwards.
Due to the clamp mechanics, it's important to understand where you can place the embroidery—and that is within a few inches of the hoop side where the clamp hinges.
DESIGNS FOR CONTINUOUS HOOPS
The best designs for repeating are those that have fewer colors and lower stitch counts. Designs that intersect each other are more forgiving than designs that must meet accurately at multiple points.
Choosing a design that is less dense will reduce sewing distortions. The less distortion during the embroidery process, the more accurate your finished strip will be. Keep in mind that continuous hoops are more prone to distortion than standard hoops because they don't hold the fabric as securely.
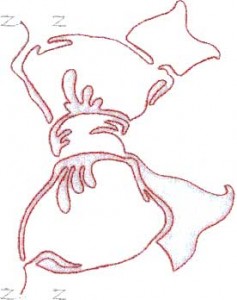
Designs often have registration stitches to assist with accurate placement. You'll notice in Lindee G designs digitized for continuous placement, that I've used a "Z-stitch." In some design these are paired both at the beginning and again at the end.
I've also set these as their own colors even though I seldom change colors to sew them. The additional color stops make it easy to advance to those sections or skip them entirely when they unnecessary.
More on Z-stitches later! Below: z-stitches faintly visible sewn in gray on the holiday bow design, perfect for quilting in the hoop.

SUPPLIES
- Design specifically digitized for continuous hooping by Lindee G Embroidery
- Appropriate hoop
- General embroidery supplies
- Fabric cut into strips and pieced if necessary
- Suitable stabilizer
- Starch (optional)
FABRIC PREPARATION
When cutting your fabric, you'll need to allow a few extra inches at each end to allow for hooping. Depending on your project, you may want to piece strips together either before or after embroidering. I often piece corners after the embroidery is complete.
You also need to consider how you will stabilize the fabric. On washable fabrics, starching the fabric helps tremendously. For backing, I prefer to use a softer stabilizer like fusible mesh cutaway or wash-away fiber.
Crisp tearaways will be creased by the hoop making it harder to rehoop without pressing. If an additional tear-away is needed, slide a smaller piece under the hooped and stabilized fabric.
When using a non-fusible stabilizer, I sometimes machine baste strips of stabilizer to the fabric (using a sewing machine, not a baste in the hoop feature), especially when working on extra long pieces or strips that will require a long period to embroider.
I also like to mark guide lines on the fabric using dressmaker's chalk to keep the design from skewing over multiple repeats.
I generally draw these guides to align with the Z stitches rather than the actual design center. Test any marking aid you use to make sure it can be completely removed.
If the strip is quite long, roll the fabric around a cardboard tube and use clips or pins to secure the tail around the tube. This keeps the fabric clean and reduces additional wrinkling. It will also reduce the possibility of the fabric tails becoming caught while sewing.
ALIGNING WITH REGISTRATION STITCHES
Continuous designs are easier to align when a registration stitch is included.
I've found a line of basting stitches in the form of a "Z" is much more accurate than a single stitch point. The Z provides more stitches to verify placement, while a single point only provides a start point that is also a pivot point allowing the design to more easily get off track.
Each continuous design has one or a pair of starting Z stitches and corresponding ending Z stitches to make perfect connections easy. Working with a pair of registration marks provides a wider match for improved accuracy. These stitches are meant to be temporary and removed after the embroidery is complete.
These stitches also make it easy to combine elements in software if you have a larger sewing field. The Z stitches are set in a different color for utility reasons. A color change will force the machine to stop and it makes it easy to skip these stitches or delete them in editing software, if desired.
While these designs are intended for a specialty border hoop, they can also be used with standard hoops. With standard hoops, you'll need to pay a little more attention to hoop and aligning.

SEWING
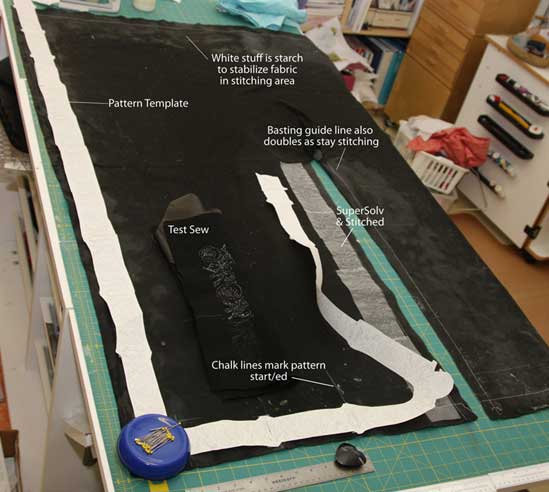
Sew from the top of the strip to the bottom; don't try to sew from opposite ends toward the middle or from the center out. A black knit cape I recently embroidered has 56 hoopings starting at the neck edge on one side and working clear around to the neck edge on the other side.
Below you can see the project during the planning and layout stage with printed templates. The first edge has been embroidered and I'm checking the placement again.
When rehooping, the bottom of the previous design needs to be just within the upper edge of the sewing field so that the Z stitches can be aligned.
This means the upper edge of the hoop will be over an embroidered area, which translates to uneven hoop tension all the way around. If you are using a standard hoop, make sure it is not too tight to avoid damaging the embroidery.
When the embroidery is complete, remove the Z stitches and stabilizer.
OTHER TIPS
Some collections will have all their Z-stitches coordinated to make it possible to mix and match design elements. This can be tough to organize over an entire collection.
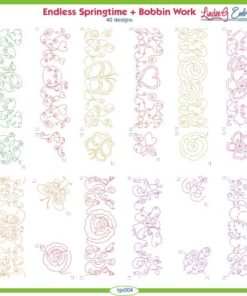
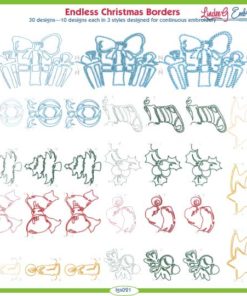
Endless Christmas Borders offers this feature. Other collections may have coordinated corner elements, as with Endless Springtime. Corners will often only turn one direction so you may need to mirror both the straight and corner pieces in some instances.
MAKING PIECES FIT
On the purchased cape shown here, I needed to fine tune some segments to get the design to line up. I chalked a straight line for alignment and then marked the top line of each Z-stitch.
If the placements were off after sewing by a small amount, once I was within a few repeats of the end, I remeasured, divided the length by the number of repeats, then adjusted the length (but not the width) of my design accordingly. This is a good trick to have up your sleeve for tweaking designs to work properly.
USES FOR CONTINUOUS DESIGNS
Common uses for continuous designs are down the legs of pants, border strips on table linens, hems on pillow cases and sheets, hems on garments, and edging on capes and scarves. Some designs will work well as bobbin work and others for quilting in the hoop.
For quilting, look for outline style designs whereas bobbin work needs a longer, looser stitch. If the collection doesn't include a bobbin work version, try enlarging the design with the stitch processor off to stretch out the stitches.
CHECK OUT THESE ENDLESS COLLECTIONS
- Endless Springtime, sewn in 30wt black & silver twist metallic on the black cape. Includes corner sections and bobbin work versions.
- Endless Christmas Borders designs in bean stitch, chain stitch, and candlewick.

RELATED ARTICLES
- How to Get Perfect Monograms on Terry Cloth Towels
Source: https://lindeegembroidery.com/blog/item/sewing-continuous-hoop-designs-2

Post a Comment for "How to Use the Continuous Border Hoop"